Mastering the Breeze: A Complete Information to Valorant’s Coastal Map
Associated Articles: Mastering the Breeze: A Complete Information to Valorant’s Coastal Map
Introduction
On this auspicious event, we’re delighted to delve into the intriguing matter associated to Mastering the Breeze: A Complete Information to Valorant’s Coastal Map. Let’s weave fascinating data and supply recent views to the readers.
Desk of Content material
Mastering the Breeze: A Complete Information to Valorant’s Coastal Map
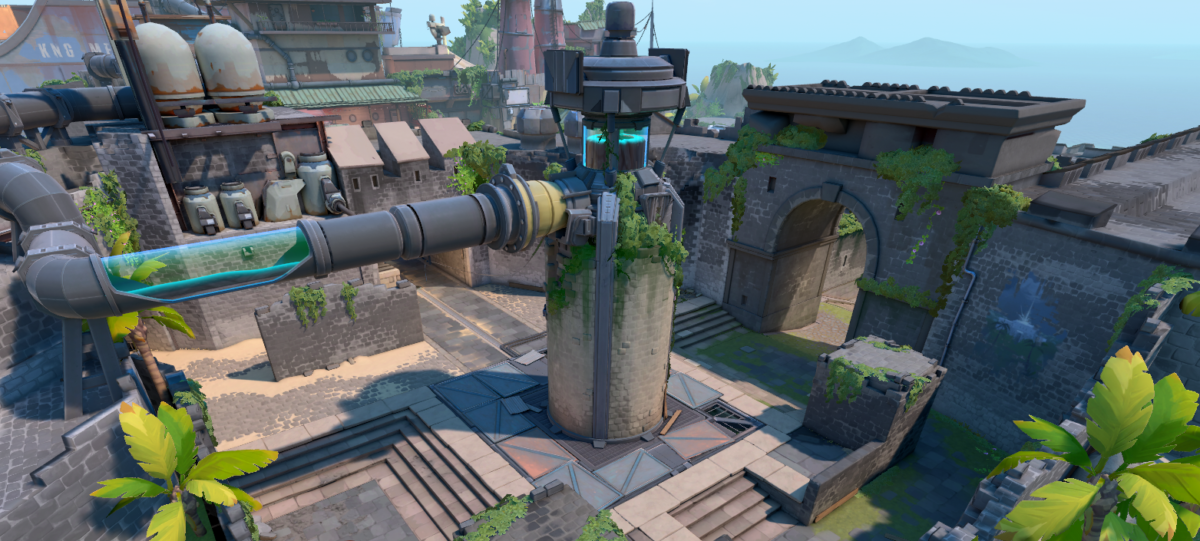
Valorant’s Breeze map, a sprawling coastal paradise, presents a novel problem to gamers accustomed to the tighter confines of different maps. Its open areas, lengthy sightlines, and various flanking routes demand a strategic strategy, rewarding calculated aggression and exact intention. This complete information delves into each nook and cranny of Breeze, offering invaluable insights for gamers of all talent ranges, from understanding its format to mastering its key methods.
Understanding the Map’s Format: A Coastal Battlefield
Breeze is characterised by its expansive format, that includes three distinct lanes related by a posh community of mid-map areas and flanking routes. Not like maps like Haven with its three websites, Breeze focuses on two fundamental bomb websites – A and B – every providing distinctive challenges and strategic alternatives.
-
Web site A: This web site is mostly thought of the extra open and aggressive web site. It options a big, comparatively uncovered space that is simply managed by defenders with good positioning. The strategy to A entails navigating a number of chokepoints, making it essential to coordinate pushes and make the most of utility successfully. The presence of a number of entry factors permits for various assault methods, but in addition makes defending difficult if not correctly coordinated.
-
Web site B: Web site B affords a extra enclosed, albeit nonetheless spacious, space. It is characterised by a extra intricate format with a number of cowl factors and potential flanking routes, making it appropriate for each aggressive and defensive methods. The strategy to B typically requires gamers to navigate by slender pathways and make the most of cowl successfully to keep away from being caught in crossfires.
-
Mid-Map: The mid-map space of Breeze is an important battleground, serving as a main route for rotating between websites and interesting in mid-round skirmishes. It is characterised by open areas interspersed with cowl, making it a high-risk, high-reward zone. Profitable management of mid-map can considerably affect the end result of a spherical, permitting for fast rotations and aggressive pushes.
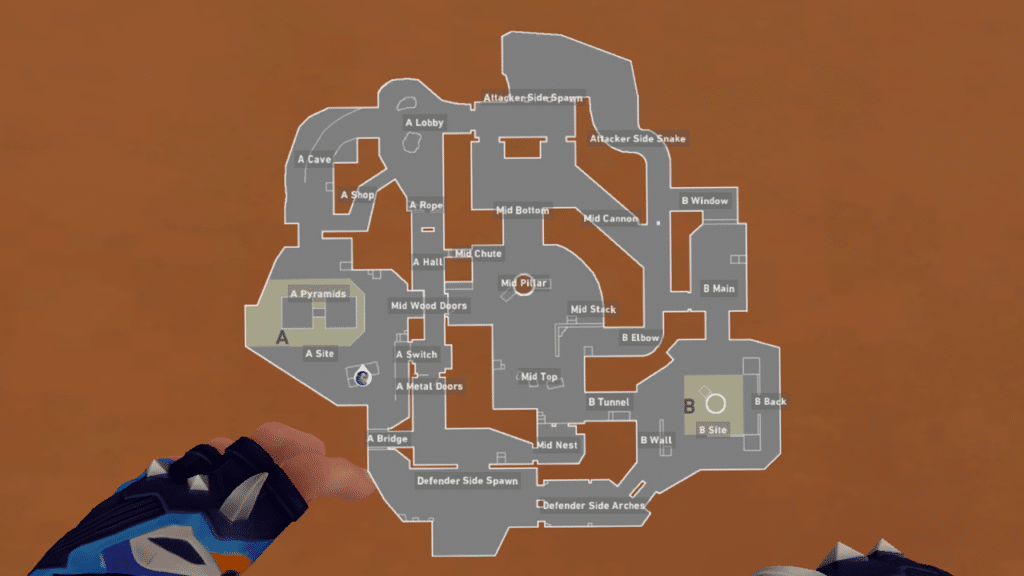
Key Places and Methods: Navigating the Terrain
Breeze’s success hinges on understanding its key areas and the way they affect gameplay. Let’s break down some essential areas:
-
A Primary: The first strategy to Web site A. Controlling this space is significant for each attackers and defenders. Attackers have to push by this chokepoint successfully, whereas defenders can make the most of the quite a few angles and canopy to carry off the advance. Using talents like smokes and flashes is essential right here.
-
A Cave: A flanking path to Web site A, providing a sneaky strategy for attackers. Nevertheless, it is a dangerous maneuver, because it leaves attackers susceptible to detection and counter-attacks. Good communication and coordination are important for using this route efficiently.
-
Mid-Courtyard: A central space within the mid-map, providing a number of angles and canopy. Controlling this space permits for fast rotations and aggressive pushes in direction of each websites. It is a hotspot for skirmishes and requires exact intention and map consciousness.
-
B Primary: The first strategy to Web site B, just like A Primary, however with barely extra cowl. Efficient use of utility and coordination is essential for each attackers and defenders.
-
B Again: A flanking path to Web site B, providing a much less direct strategy. It is typically used to create distractions or catch defenders off guard.
-
The Arch: A distinguished construction within the mid-map, providing a long-range sightline. It is a dangerous place, however can present worthwhile data and permit for aggressive performs.
Agent Choice and Composition: Synergies on Breeze
The open nature of Breeze favors brokers with sturdy long-range capabilities and utility that may management house successfully. Nevertheless, the existence of flanking routes additionally necessitates brokers who can supply assist and canopy in tight corners. Listed here are some brokers who excel on Breeze:
-
Sova: His Recon Bolt and Owl Drone are invaluable for gathering data on enemy positions throughout the map’s lengthy sightlines.
-
Cypher: His Cyber Cage can successfully choke off widespread entry factors, whereas his Spycam offers essential data on enemy actions.
-
Killjoy: Her Turret and Nanoswarm can present sturdy defensive capabilities, particularly at chokepoints.
-
Sage: Her therapeutic talents are essential for sustaining pushes, notably on the extra uncovered Web site A.
-
Jett: Her mobility permits for fast rotations and aggressive performs, making her a worthwhile asset for each attacking and defending.
-
Reyna: Her self-sustaining talents are extremely highly effective in aggressive performs, permitting her to push by chokepoints and safe kills.
Methods for Attackers and Defenders: A Balanced Strategy
Efficient gameplay on Breeze requires a nuanced understanding of each attacking and defending methods.
Attacker Methods:
-
Coordinate Pushes: Because of the map’s open nature, coordinated pushes are essential to keep away from being picked off individually.
-
Make the most of Utility: Smokes and flashes are important for securing chokepoints and pushing by enemy traces.
-
Management Mid-Map: Gaining management of mid-map permits for fast rotations and aggressive performs.
-
Exploit Flanking Routes: Make the most of the flanking routes to catch defenders off guard.
Defender Methods:
-
Maintain Chokepoints: Successfully holding chokepoints like A Primary and B Primary is significant for controlling the circulate of the spherical.
-
Make the most of Lengthy-Vary Sightlines: The open nature of the map permits defenders to make the most of long-range weapons successfully.
-
Rotate Strategically: Fast rotations are essential for responding to pushes on each websites.
-
Talk Successfully: Clear communication is crucial for coordinating defensive efforts and responding to attacker actions.
Superior Methods and Ideas:
-
Lineups: Mastering lineups for smokes and mollies can considerably improve your skill to regulate key areas.
-
Map Consciousness: Fixed consciousness of enemy positions and potential flanking routes is essential for achievement.
-
Communication: Clear and concise communication together with your crew is significant for coordinating pushes and defenses.
-
Adaptability: Be ready to adapt your methods based mostly on the enemy crew’s composition and playstyle.
Conclusion: Mastering the Breeze
Breeze, with its distinctive mix of open areas and strategic chokepoints, presents a dynamic and rewarding problem in Valorant. By understanding its format, mastering its key areas, and using the correct agent compositions and methods, gamers can remodel this coastal battlefield right into a stage for his or her tactical prowess. This information serves as a basis; steady observe, adaptation, and communication are the keys to actually mastering the Breeze and reaching victory on this difficult but charming map. Bear in mind to check replays, analyze your personal gameplay, and study out of your errors – the journey to mastery is an ongoing course of, and the rewards on Breeze are effectively well worth the effort.


Closure
Thus, we hope this text has supplied worthwhile insights into Mastering the Breeze: A Complete Information to Valorant’s Coastal Map. We hope you discover this text informative and useful. See you in our subsequent article!