Mapping the Little Bighorn: A Geographic Evaluation of the Battle’s Decisive Moments
Associated Articles: Mapping the Little Bighorn: A Geographic Evaluation of the Battle’s Decisive Moments
Introduction
With enthusiasm, let’s navigate by means of the intriguing matter associated to Mapping the Little Bighorn: A Geographic Evaluation of the Battle’s Decisive Moments. Let’s weave attention-grabbing data and provide recent views to the readers.
Desk of Content material
Mapping the Little Bighorn: A Geographic Evaluation of the Battle’s Decisive Moments

The Battle of the Little Bighorn, fought on June 25-26, 1876, stays one of the crucial iconic and controversial occasions in American historical past. Whereas the narrative usually focuses on the conflict of cultures and the heroic (or villainous, relying on perspective) figures concerned, a deeper understanding of the battle requires a cautious examination of its geographical context. The terrain, the river, and the positioning of each the Lakota-Cheyenne-Arapaho forces and the seventh Cavalry profoundly formed the battle’s unfolding and its finally tragic final result for Custer and his males. This text will delve into the geographical elements that contributed to the Little Bighorn’s dramatic and decisive final result, utilizing maps for instance key tactical selections and their penalties.
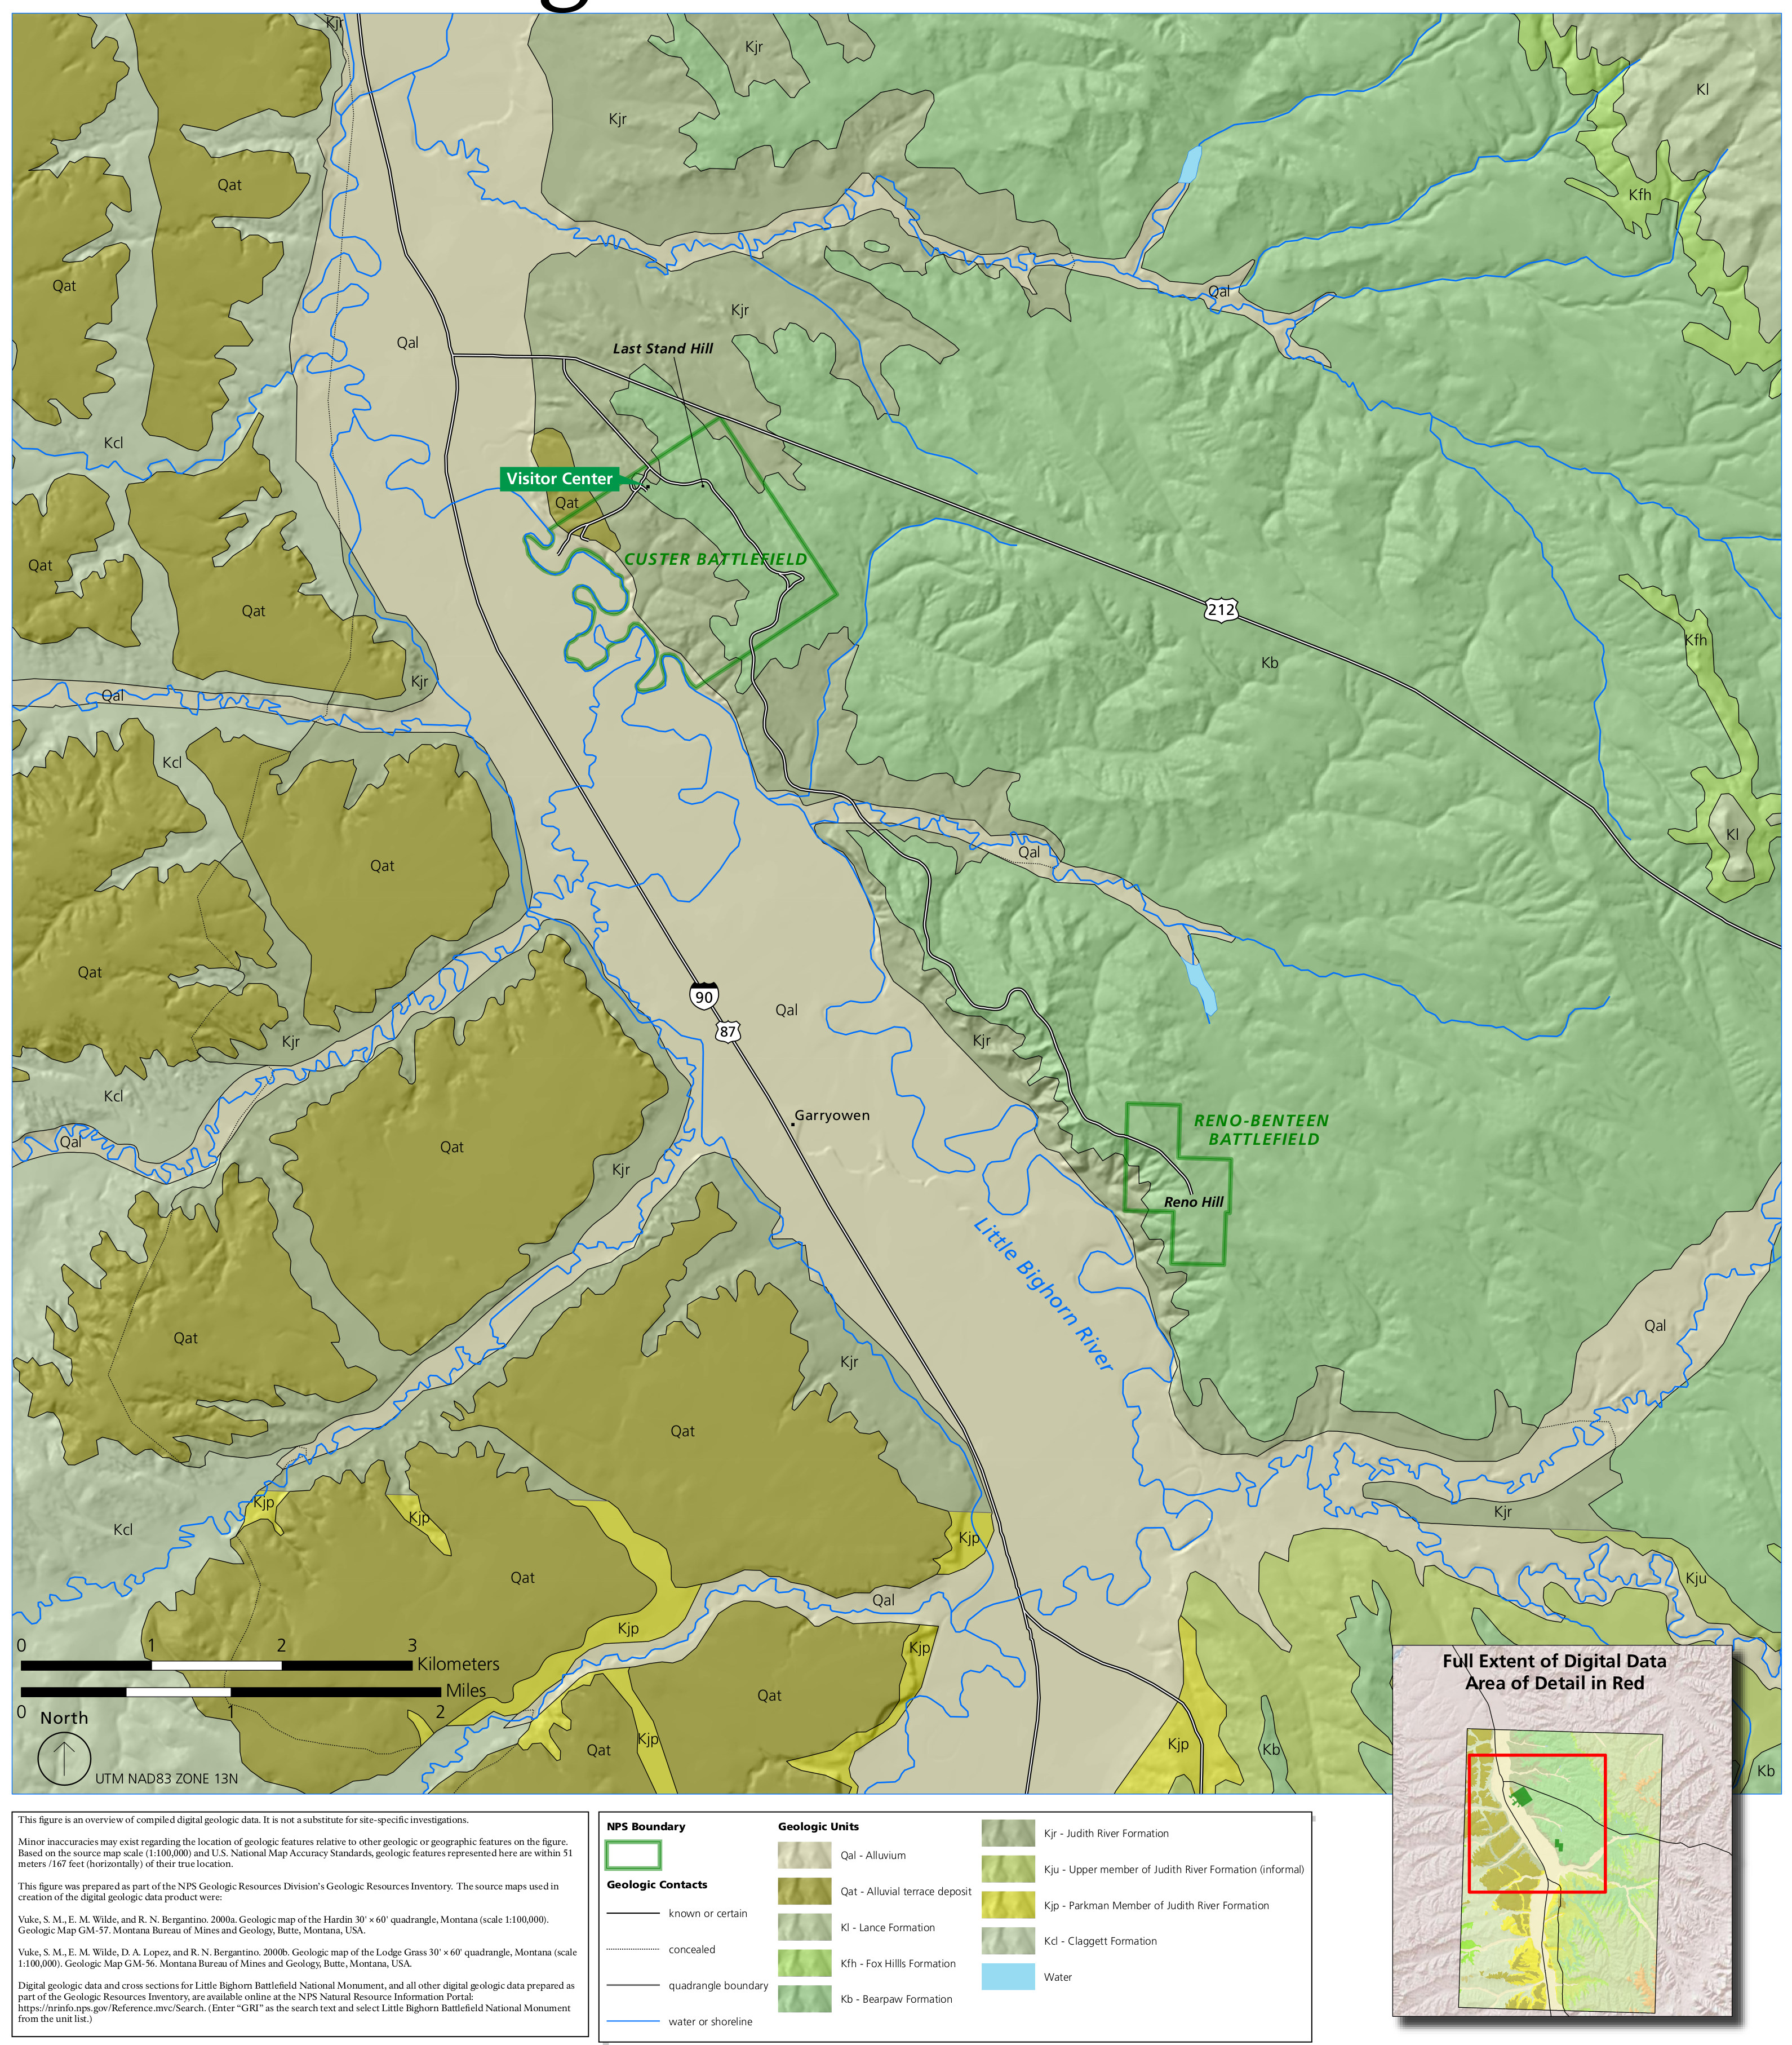
(Insert Map 1: A normal map of the Little Bighorn Battlefield, displaying the Little Bighorn River, the primary ridges, and the approximate positions of the preliminary deployments of each armies. This map must be comparatively easy, specializing in main geographical options.)
Map 1 gives a broad overview of the battlefield. The Little Bighorn River, a vital geographical characteristic, snakes its method by means of the valley, dividing the panorama and influencing troop actions. The river’s banks, usually steep and closely wooded, supplied pure defensive positions, whereas the comparatively flat valley ground supplied restricted cowl for maneuvering troops. The encompassing ridges, although not notably excessive, supplied superior vantage factors and the potential for flanking maneuvers. The preliminary deployment of either side was closely influenced by these geographical constraints. Lieutenant Colonel George Armstrong Custer, anticipating a smaller, much less organized Native American drive, deployed his seventh Cavalry in a three-pronged assault, a call that might show fatally flawed.
(Insert Map 2: A extra detailed map specializing in Custer’s preliminary deployment and the actions of the three battalions (Main Marcus Reno, Captain Frederick Benteen, and Custer’s personal battalion). Point out the approximate areas of key engagements and the course of Native American assaults.)
Map 2 highlights the disastrous penalties of Custer’s underestimation of the Native American forces. His division of the seventh Cavalry into three separate battalions, whereas seemingly logical given his preconceived notions of the enemy’s energy, resulted in a deadly dispersion of his forces. Reno’s battalion, tasked with attacking the village from the north, encountered fierce resistance and was compelled to retreat throughout the river, struggling heavy casualties. Benteen’s battalion, initially despatched to strengthen Reno, was finally delayed and performed a comparatively minor position in the primary battle. Custer’s personal battalion, making an attempt a daring flanking maneuver, was decisively overwhelmed by the sheer measurement and ferocity of the mixed Lakota, Cheyenne, and Arapaho forces. The map reveals the converging traces of assault by the Native American warriors, successfully encircling and destroying Custer’s command.
The terrain performed a vital position on this devastating defeat. Custer’s choice to advance in the direction of the village throughout the comparatively open valley ground, reasonably than using the duvet supplied by the ridges, uncovered his males to devastating fireplace from a vastly superior drive. The Native American warriors, expert horsemen and knowledgeable fighters, utilized the terrain to their benefit, using a mix of mounted prices and devastating flanking maneuvers that shattered Custer’s tactical plan.
(Insert Map 3: A map illustrating the defensive positions held by Reno and Benteen, highlighting the numerous defensive benefit supplied by the river and the encircling terrain. Present the factors of assault by the Native American forces.)
Map 3 demonstrates the defensive energy of the positions held by Reno and Benteen after their preliminary assaults. The Little Bighorn River supplied a pure barrier, whereas the steep banks and the encircling terrain supplied some safety towards the relentless assaults. Nevertheless, the map additionally reveals the numerical superiority of the Native American warriors, who have been in a position to successfully encompass and strain each battalions, stopping a coordinated counterattack or a profitable escape. The defensive positions, whereas offering some respite, have been finally inadequate to beat the overwhelming drive arrayed towards them.
The geographical elements additionally influenced the general technique of the Native American forces. Their superior data of the terrain allowed them to successfully make the most of the duvet supplied by the ridges and the river to launch devastating assaults, whereas concurrently stopping the seventh Cavalry from successfully maneuvering or receiving reinforcements. The mixed drive, underneath the management of Sitting Bull, Loopy Horse, and different distinguished chiefs, demonstrated distinctive coordination and tactical acumen, using the terrain to maximise their energy and exploit the weaknesses in Custer’s plan.
(Insert Map 4: A post-battle map displaying the areas of the primary battle websites, the scattered stays of Custer’s battalion, and the areas of the our bodies of the fallen troopers. This map ought to spotlight the brutality of the battle and the widespread nature of the casualties.)
Map 4 affords a chilling testomony to the brutality of the battle. The scattered areas of the stays of Custer’s battalion illustrate the chaotic and determined nature of their closing stand. The map highlights the extent of the casualties suffered by the seventh Cavalry, underscoring the overwhelming nature of the Native American victory. The widespread distribution of the our bodies reveals the ferocity of the combating and the lack of Custer’s males to ascertain a coherent defensive place.
The Battle of the Little Bighorn was not merely a conflict of armies; it was a conflict of methods profoundly influenced by the geographical panorama. Custer’s flawed evaluation of the terrain and the enemy’s energy, coupled along with his overly aggressive and dispersed deployment, led on to the devastating defeat of his command. In distinction, the Native American forces, intimately acquainted with the land, expertly utilized the terrain to their benefit, orchestrating a decisive victory that is still a robust image of Native American resistance. The maps introduced right here, whereas simplified representations of a posh occasion, present a vital visible support for understanding the numerous position geography performed in shaping the result of this pivotal battle. By analyzing the maps together with historic accounts, we are able to acquire a deeper appreciation for the strategic complexities and tragic penalties of the Battle of the Little Bighorn. Additional analysis into the particular topographical particulars of the battlefield, together with soil varieties, vegetation, and water sources, may present much more nuanced insights into the battle’s unfolding. The maps function a relentless reminder of the human value of battle and the lasting significance of understanding the interaction between geography, technique, and human future.


Closure
Thus, we hope this text has supplied priceless insights into Mapping the Little Bighorn: A Geographic Evaluation of the Battle’s Decisive Moments. We hope you discover this text informative and useful. See you in our subsequent article!